Responding to SMS Text Messages with Python & Flask
Short Message Service (SMS) text messages are easy to send from Python applications with a web application programming interface (API). Flask applications can also receive incoming text messages and respond back to the sender with just a few lines of Python code.
Tools We Need
This tutorial is fine for both Python 2 and 3. Make sure you have one of those two versions installed on your system.
- Either Python 2 or 3
- pip and virtualenv to handle application dependencies
- The Flask micro web framework
- A free Twilio account to use their SMS web API
- Open source Twilio Python helper library
- Ngrok for localhost tunneling to our Flask application while it's running on our local development environment
If you need assistance getting pip and virtualenv installed, take a look at the first few steps in the how to set up Python 3, Flask and Green Unicorn on Ubuntu 16.04 LTS guide, which shows how to install system packages for those tools.
Installing Our Dependencies
Our code will use a helper library to make it easier to respond to text messages from Python. The helper library dependency along with the Flask code library can be installed from PyPI into a virtualenv. In your terminal use the following command to generate a new virtualenv.
virtualenv respondsms
Activate the virtualenv.
source respondsms/bin/activate
The command prompt will change after we properly activate the virtualenv to something like this:

Install Flask and the Twilio Python helper library into the virtualenv with
the pip command.
pip install flask twilio==5.7.0
The dependencies are installed so that we can use it with our Python code. Now we can write our Python application.
Building Our Flask Web App
Our Flask application will have two routes: one to make sure the web app
is running and another that handles incoming HTTP POST requests. Create
a new file named app.py in your home directory or where you choose to
store your Python project files.
Within app.py write the following code. You can also see
this code in a GitHub Gist
if that's easier to copy and paste.
from flask import Flask, Response, request
from twilio import twiml


app = Flask(__name__)


@app.route("/")
def check_app():
    # returns a simple string stating the app is working
    return Response("It works!"), 200


@app.route("/twilio", methods=["POST"])
def inbound_sms():
    response = twiml.Response()
    # we get the SMS message from the request. we could also get the
    # "To" and the "From" phone number as well
    inbound_message = request.form.get("Body")
    # we can now use the incoming message text in our Python application
    if inbound_message == "Hello":
        response.message("Hello back to you!")
    else:
        response.message("Hi! Not quite sure what you meant, but okay.")
    # we return back the mimetype because Twilio needs an XML response
    return Response(str(response), mimetype="application/xml"), 200


if __name__ == "__main__":
    app.run(debug=True)
The inline comments on the lines starting with # explain what the lines
below them do. Flask applications define URL routes with the @app.route
decorator. Our application needs two routes therefore we have two of those
decorators defined.
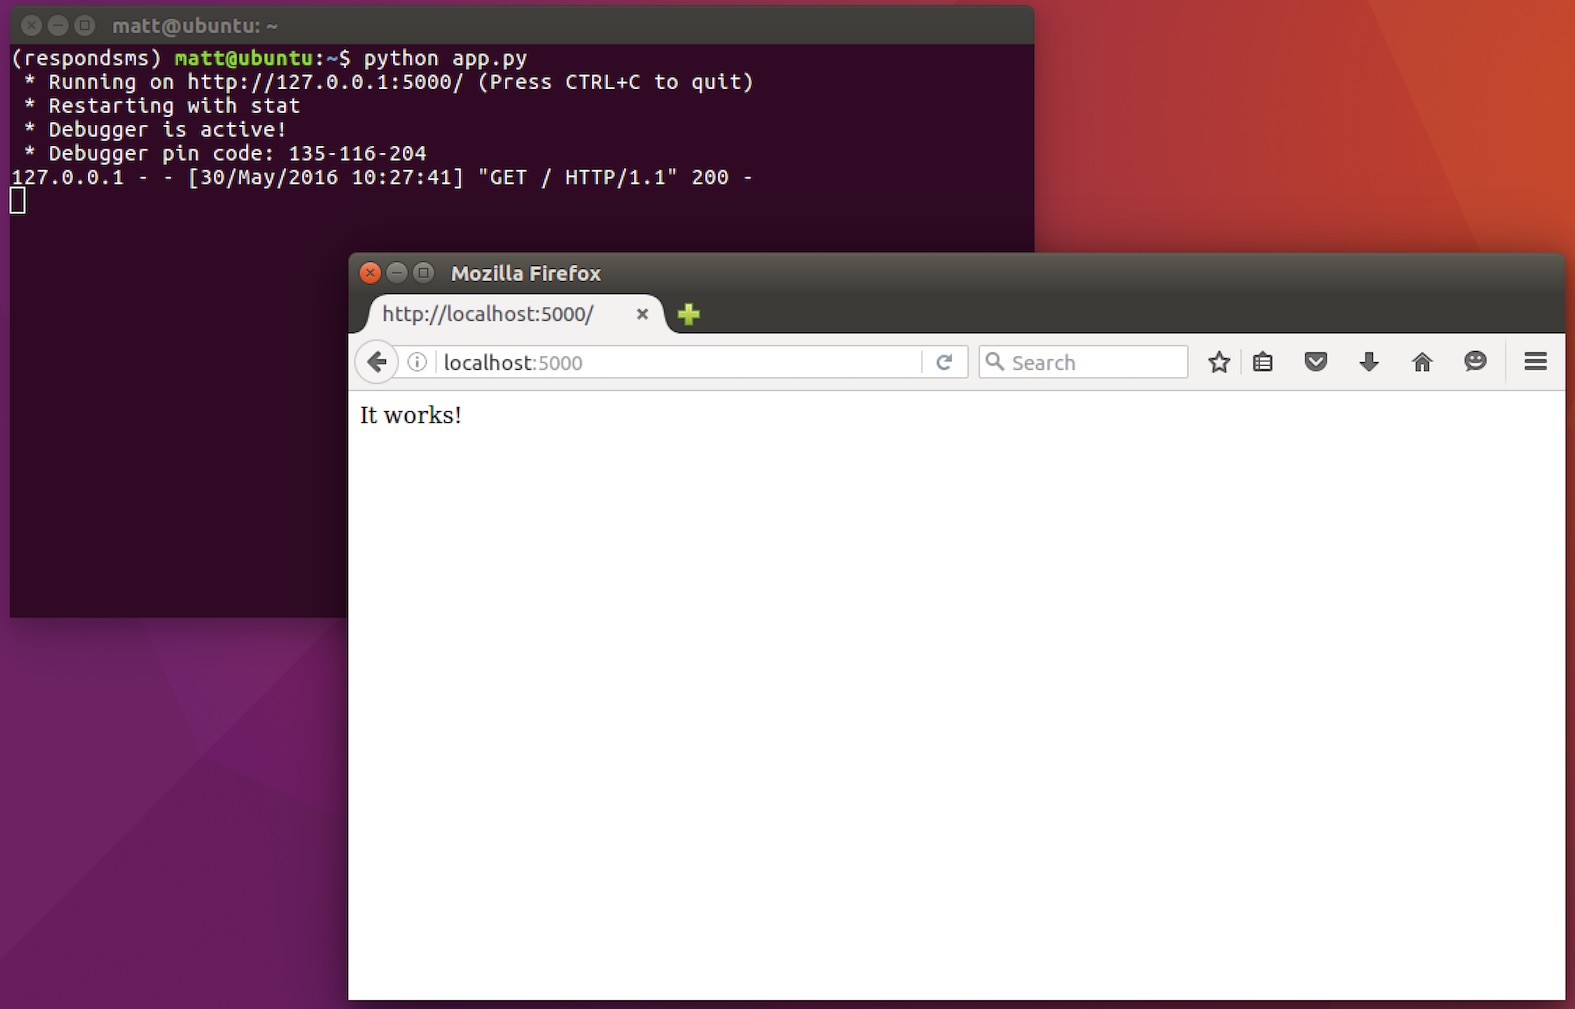
Give the application a try by running it with python app.py. If you have
trouble running the program, make sure your virtualenv is still active so
that the application can use the Flask and Twilio code libraries we installed
earlier.
Open a web browser and go to localhost:5000 (or 127.0.0.1:5000). We should see "It works!" on the screen.
There is one problem with our application running on our local development environment: there's no way for our server to receive HTTP POST requests unless we use a localhost tunnel.
Localhost Tunneling with Ngrok
Ngrok provides a localhost tunnel so that outside services can connect to a server running in your local development environment. Download and install Ngrok.
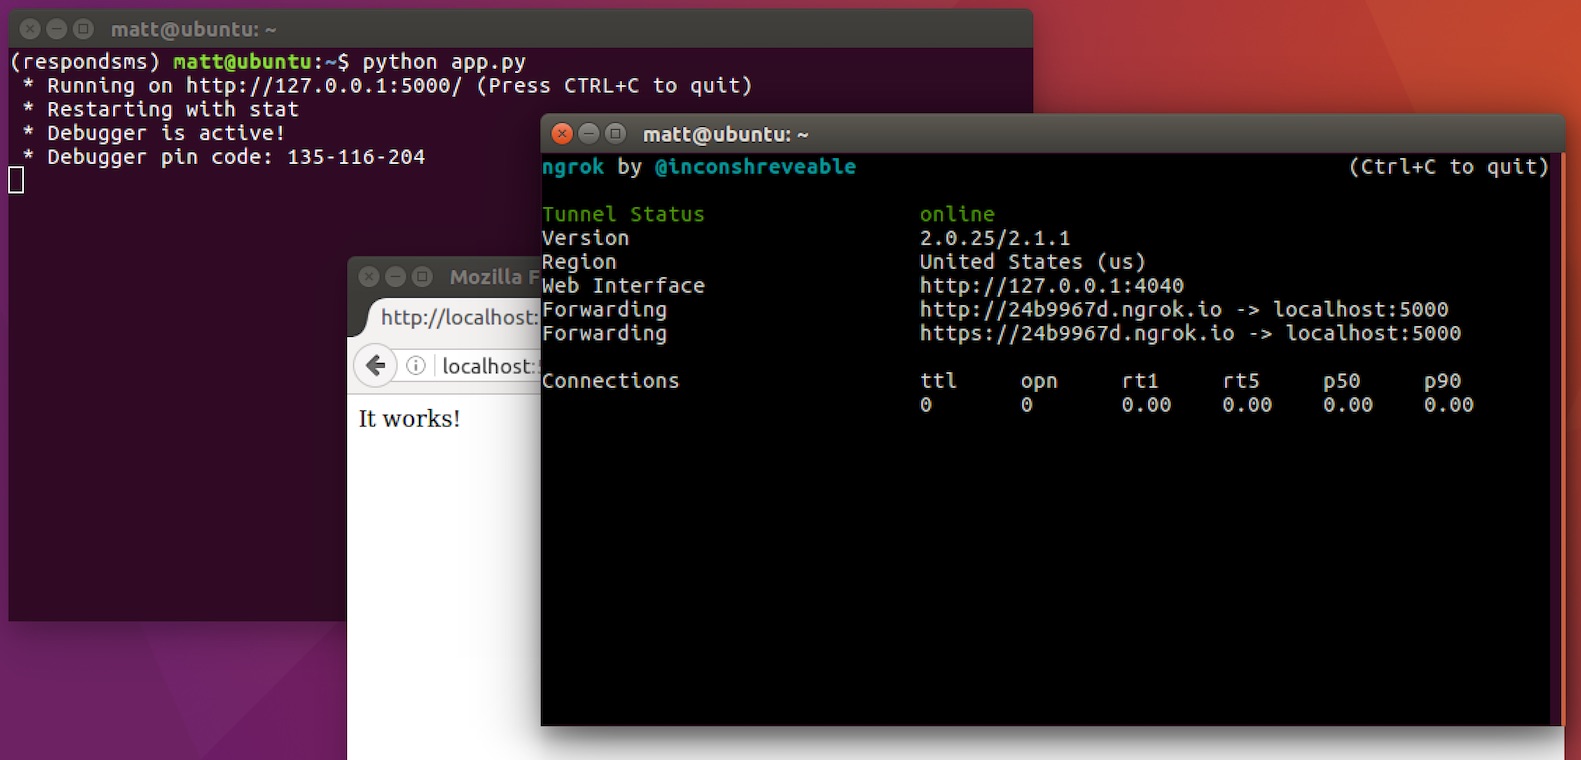
We can now run Ngrok locally and connect our Flask app running on port 5000. Within the directory where you extracted Ngrok, run this command.
./ngrok http 5000
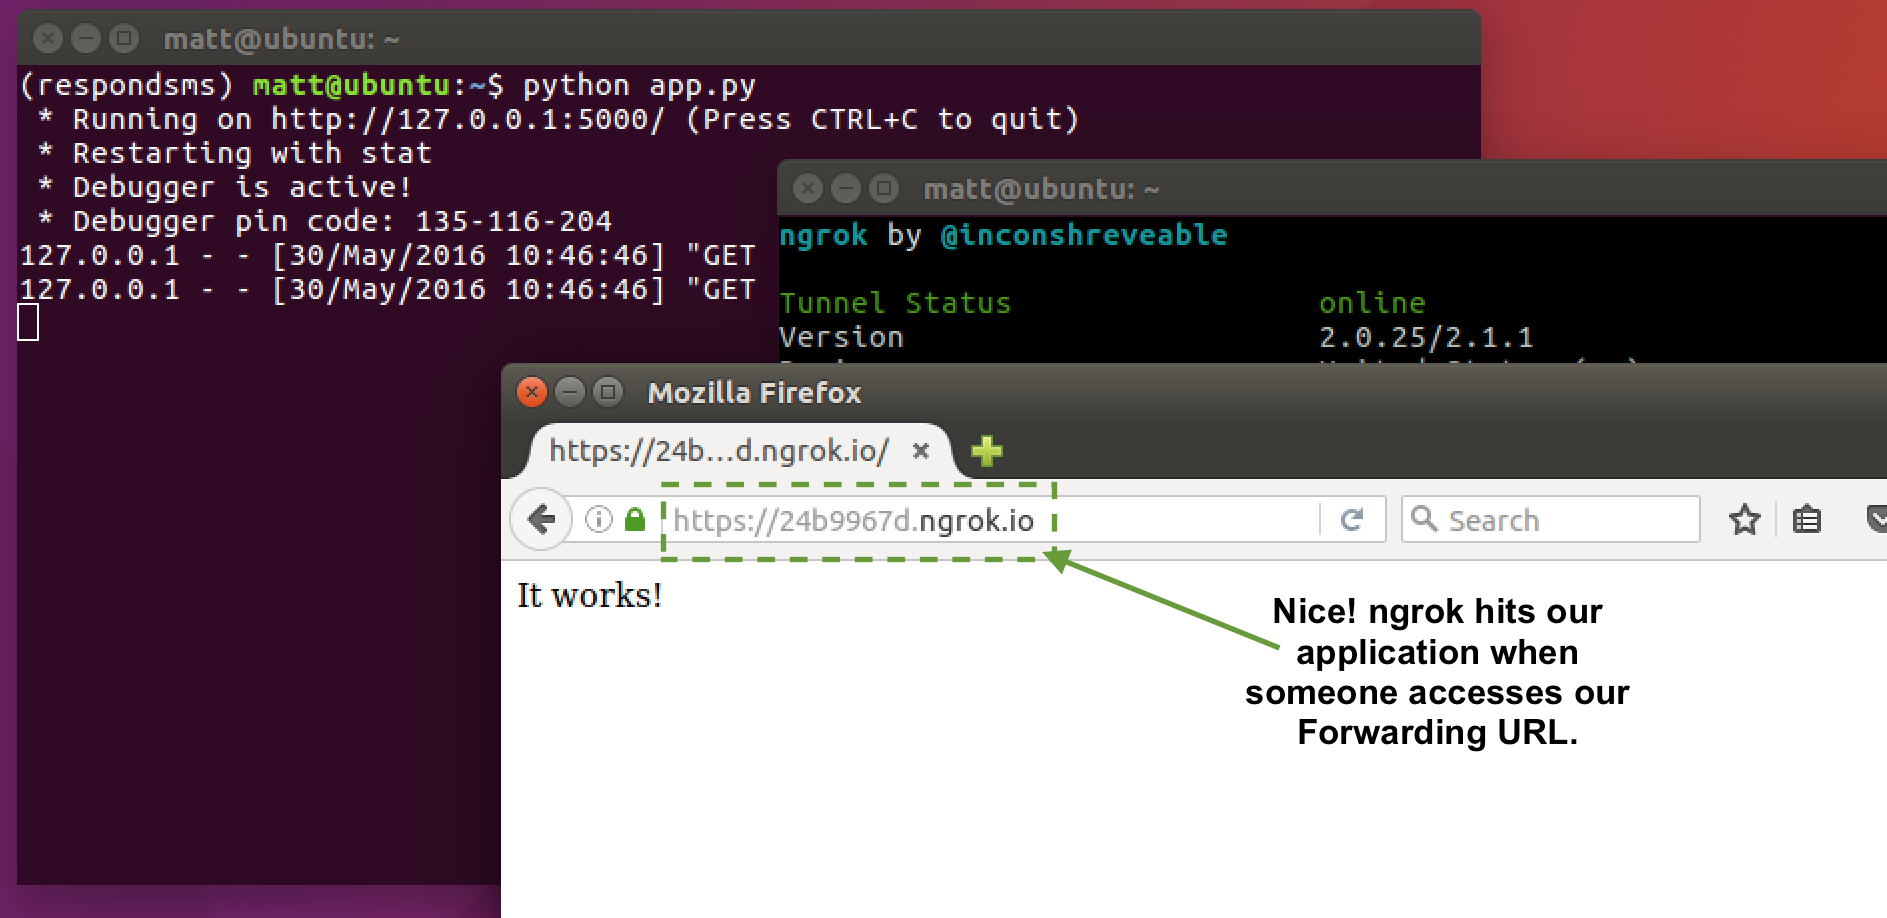
Awesome, now we can use that Ngrok Forwarding URL to access our application from any machine that has an internet connection. Replace the URL in the web browser with your own Forwarding URL, like I did in this screenshot.
We just need a phone number that'll hit our application with a POST request to respond to text messages.
Obtaining Our Phone Number
We can use our Flask application's route to respond to incoming web API requests based on incoming SMS messages to a Twilio phone number. Go to the Twilio website and sign up for a free trial account to use their API. If you already have a Twilio account then sign into your existing account.
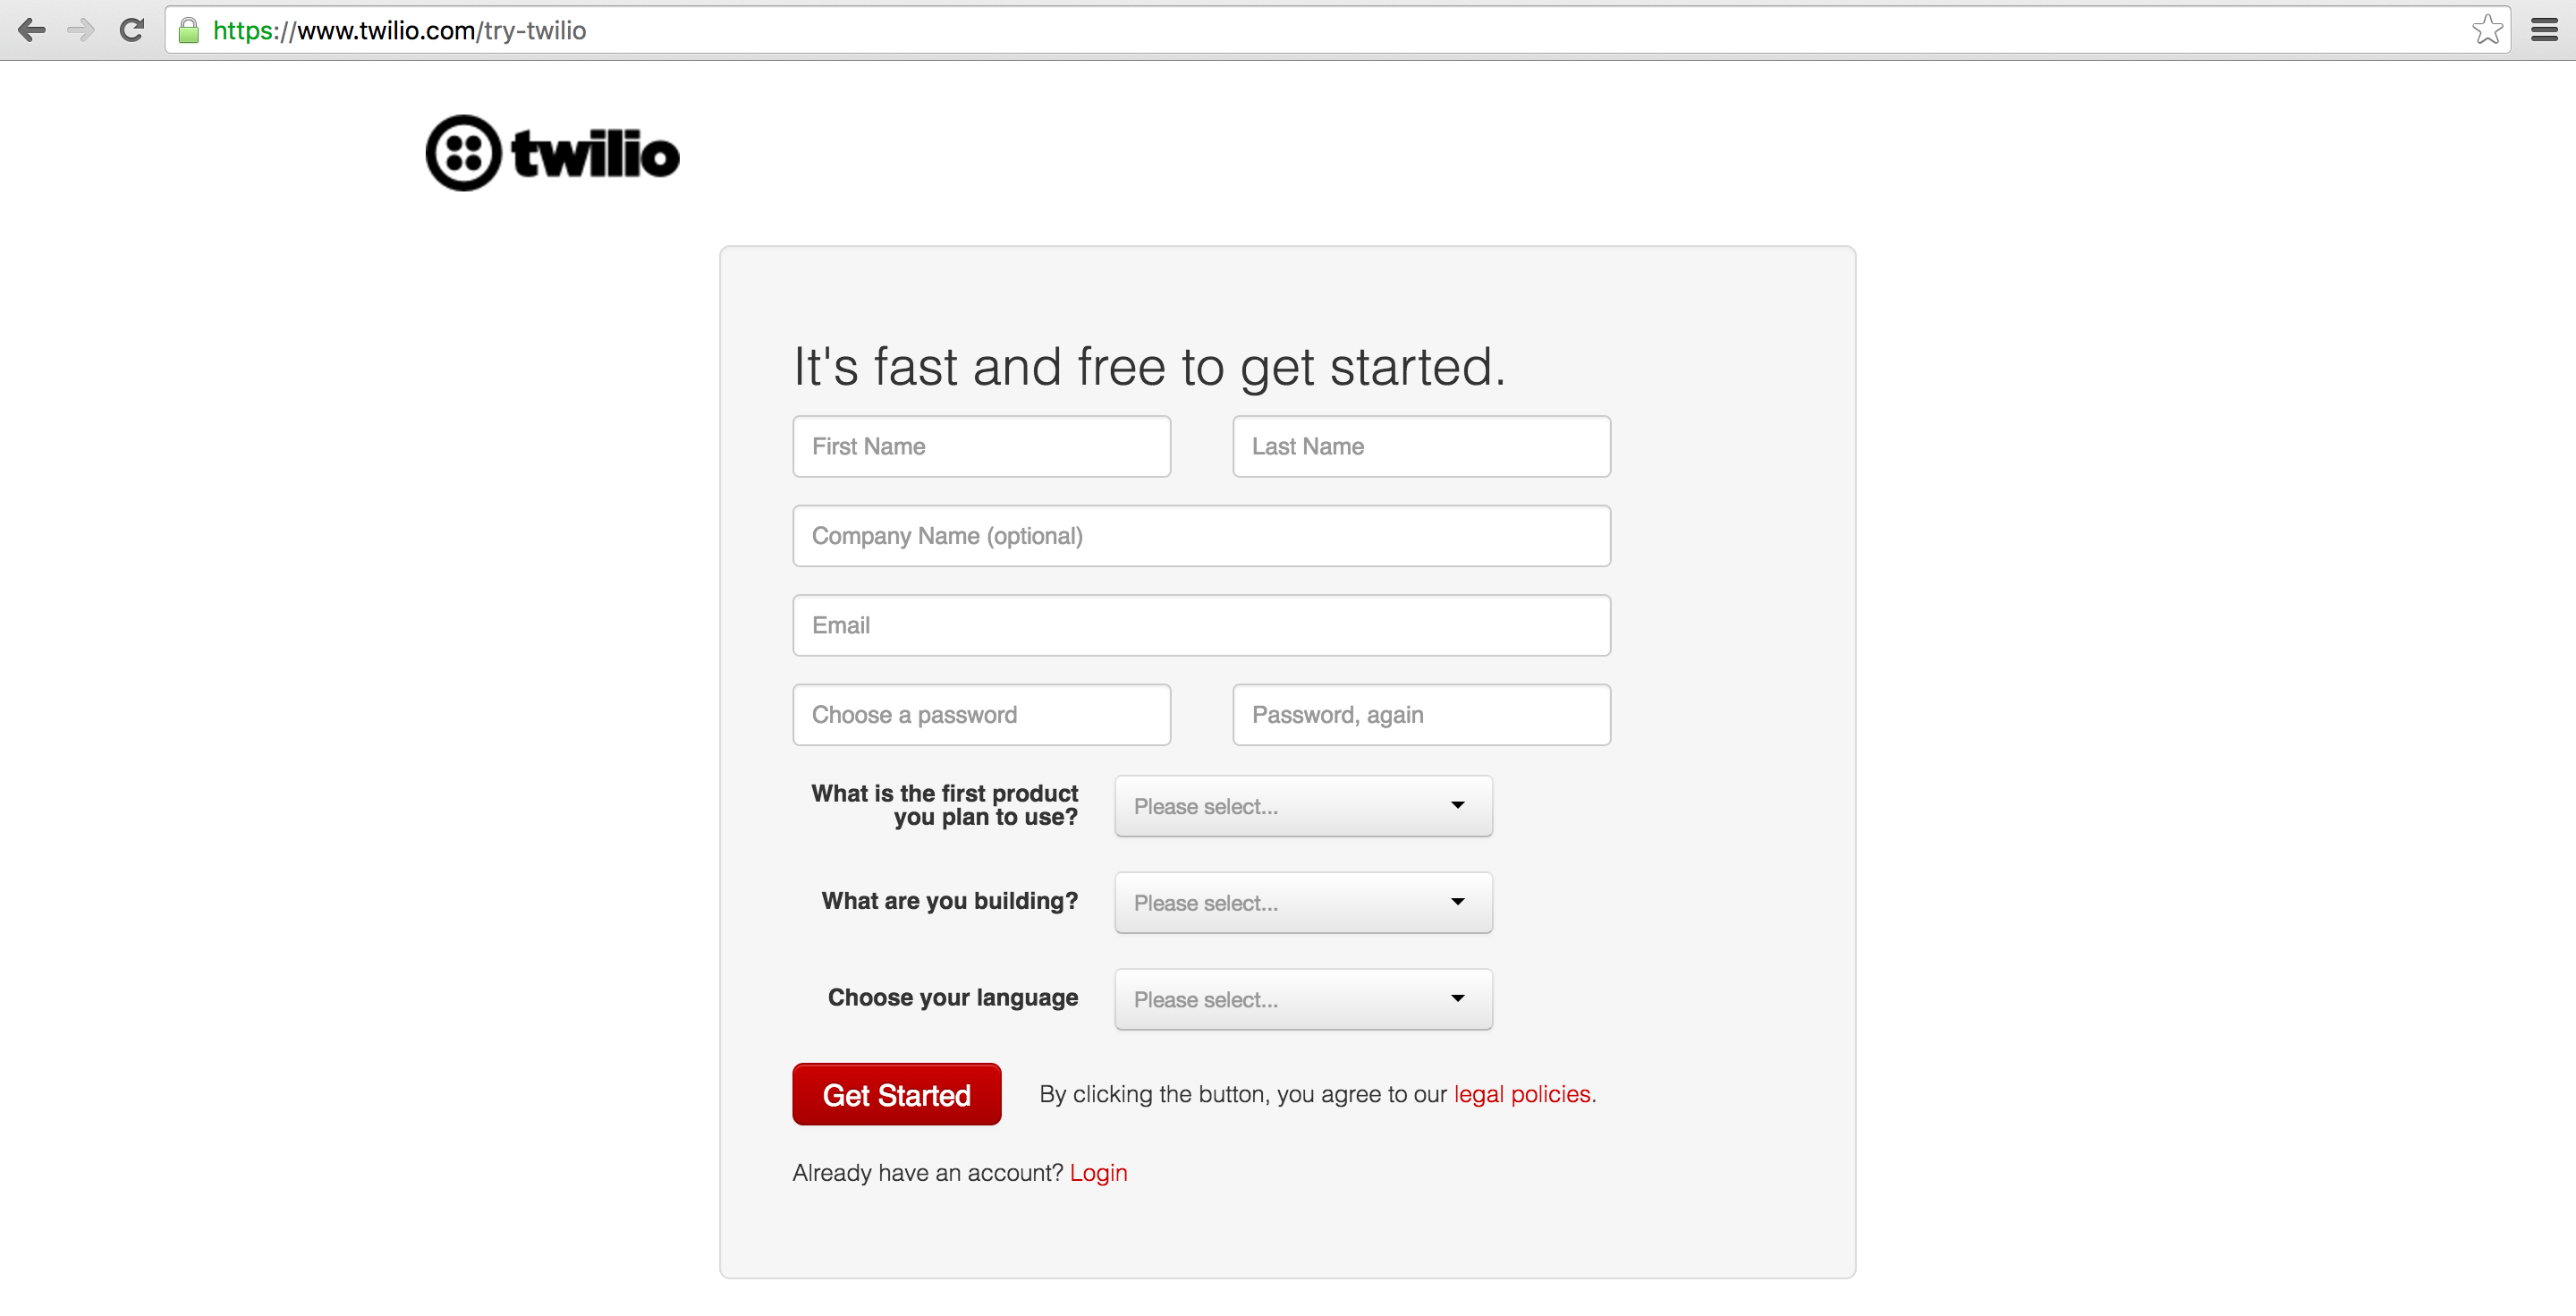
The Twilio trial account allows you to send and receive text messages to your own validated phone number. To send and respond to SMS to and from any phone number then you need to upgrade your account. Trial accounts are great for initial development before your application goes live.
When you sign up, you receive a free Twilio phone number. We can configure that phone number to forward the SMS information to our web application by setting up the response webhook.
Go to the manage phone numbers screen and click on the phone number you want to configure for responding to inbound text messages.
Scroll down to near the bottom of the page and look for the "Messaging" header. Modify the "A Message Comes in" text box so that it has your ngrok Forwarding URL plus the "/twilio" route, as shown in this screenshot.
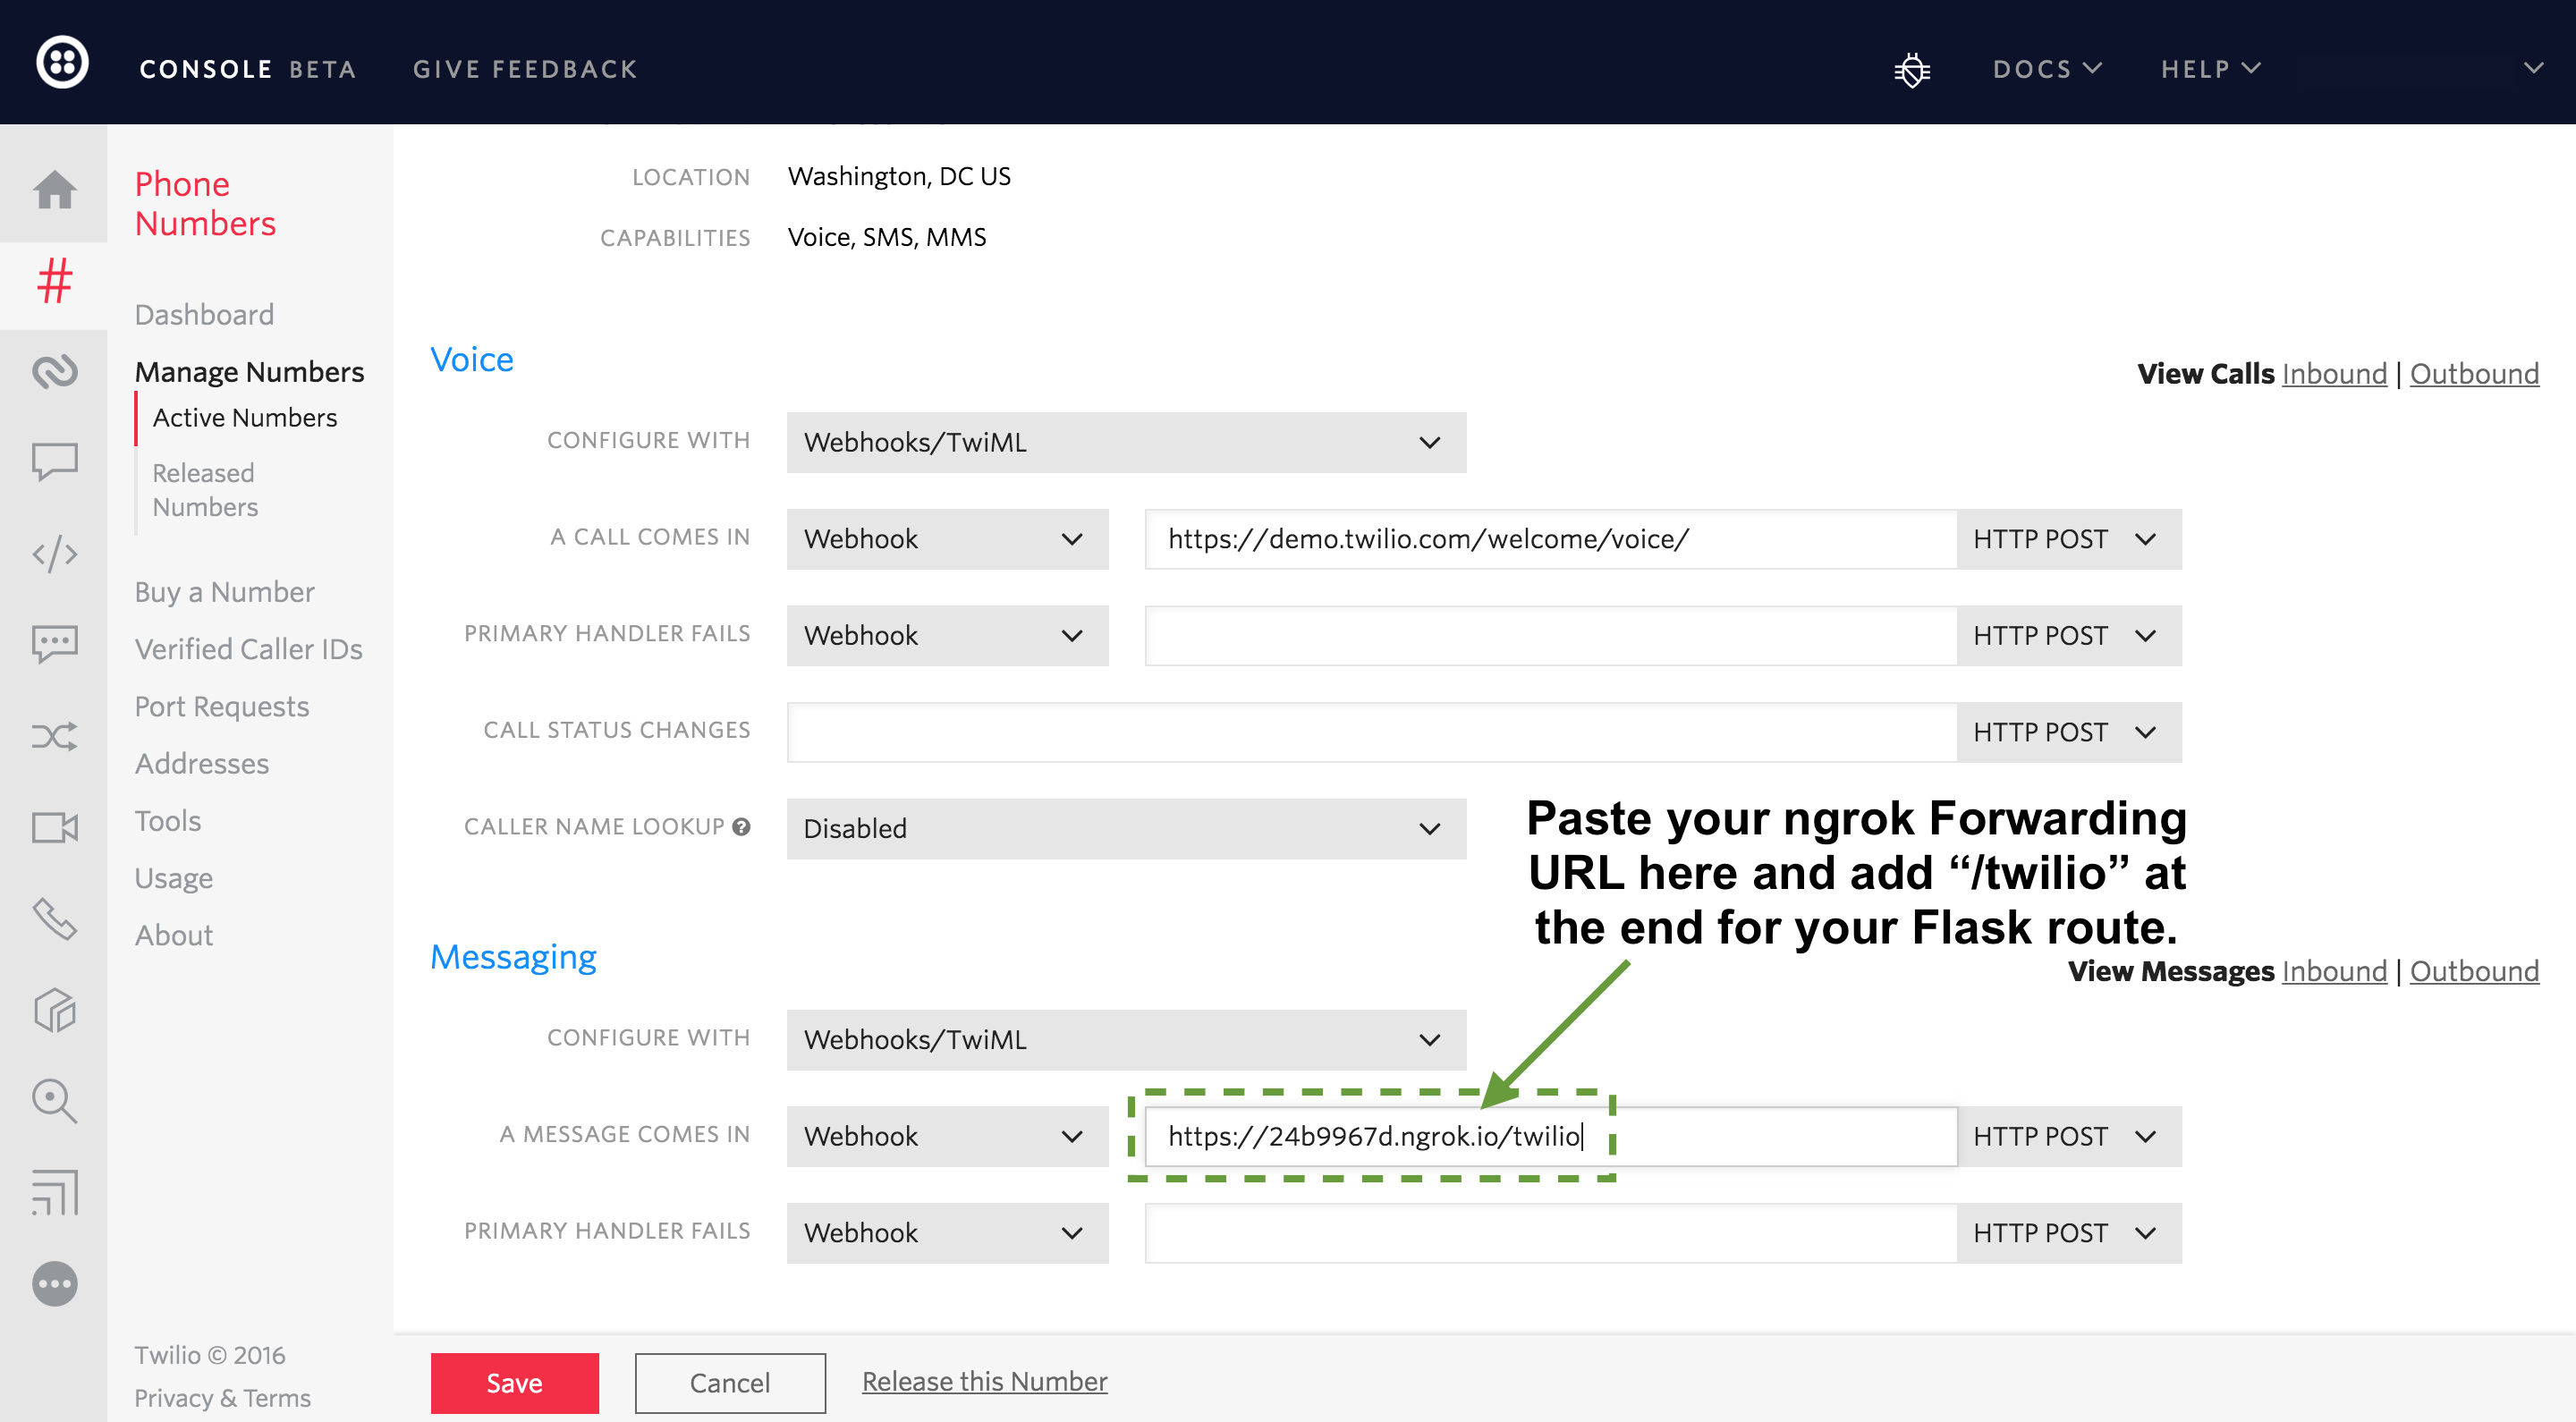
Now press the red "Save" button at the bottom to make our changes take effect.
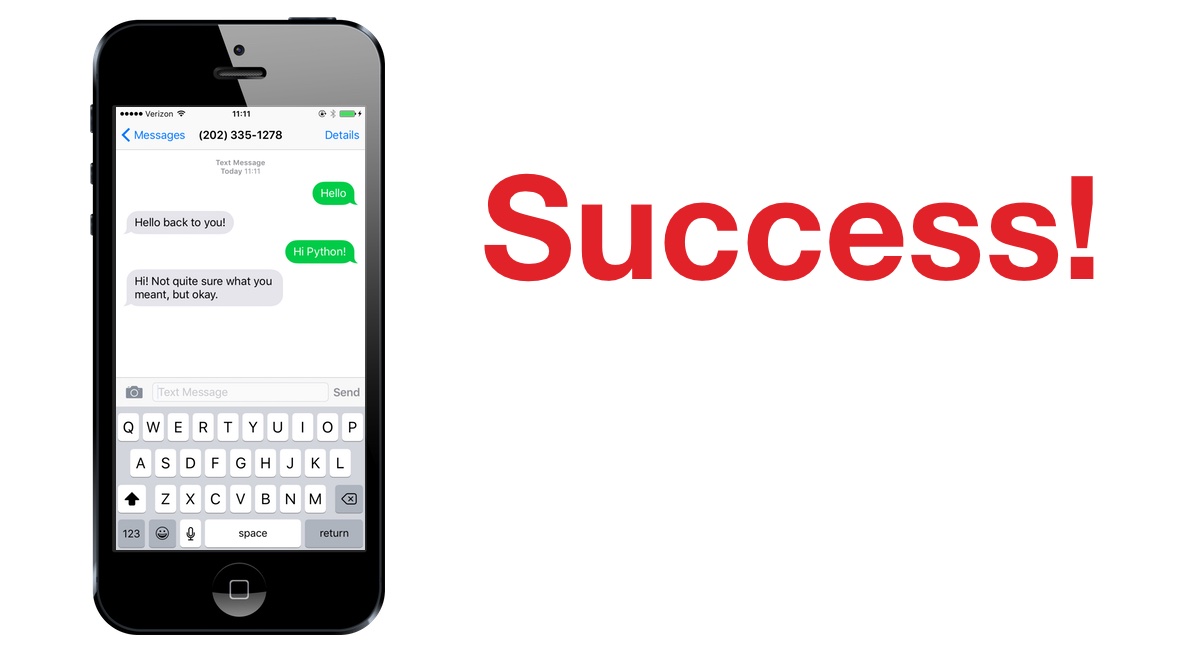
Our application is ready to go - time to give our phone number a try! Send "Hello" or whatever text you want to your phone number. Here is what the result looks like on my iPhone.
This simple Flask application is a good start to build more complicated responses such as adding natural language processing, building SMS Slack bots or coding SMS-powered NES Game Genies.
What's next?
Sweet, now our Flask web app automatically responds to incoming SMS text messages! It's pretty crazy to think that entire businesses such as SuperPhone and Remind are built off code that started out very similar to the code we just wrote.
Questions? Contact me via Twitter @fullstackpython or @mattmakai. I'm also on GitHub with the username mattmakai.
See something wrong in this post? Fork this page's source on GitHub and submit a pull request.